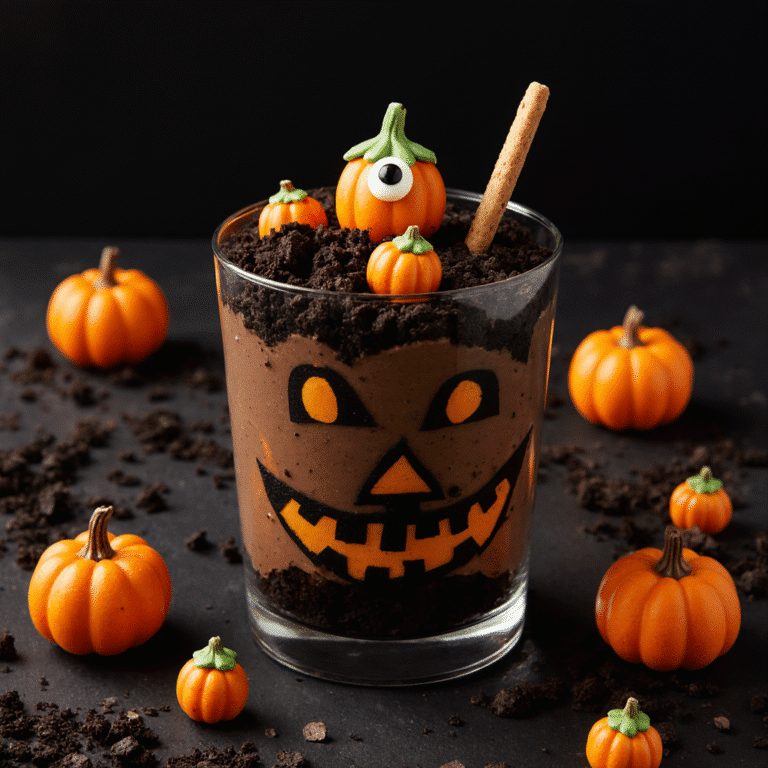
Halloween is all about fun, frights, and of course treats! These Halloween Dirt Cups are the perfect no-bake dessert to bring to a party, share with the kids, or even serve at an adults-only gathering. With layers of creamy chocolate pudding, fluffy whipped topping, and crushed cookies “dirt,” every bite feels like a little spooky surprise. Top them with gummy worms, candy eyeballs, or marshmallow ghosts, and you’ve got a dessert that’s both delicious and frightfully festive.
Table of Contents
Why You’ll Love This Recipe
Halloween Dirt Cups are more than just a festive dessert — they’re a fun, crowd-pleasing treat that works for any spooky celebration. Here’s why you’ll want to make them every October:
- Fast and fuss-free – With instant pudding and crushed cookies, these come together in under 20 minutes.
- No baking required – Perfect for busy hosts or last-minute party prep.
- Fun to decorate – From gummy worms to candy eyeballs, you can get as creative (or creepy) as you like.
- Kid- and adult-friendly – Keep them classic for kids or add a boozy twist for grown-up gatherings.
- Great for make-ahead – Assemble ahead of time and chill until serving so you can focus on enjoying the party.
If you’re looking for more frightfully fun ideas, you’ll find plenty in our Halloween recipe collection to keep the spooky spirit alive.
Print
Halloween Dirt Cups: Easy, Spooky, and Perfect for Parties
- Total Time: 1 hour 15 minutes
- Yield: 6 cups 1x
- Diet: Vegan
Description
These Halloween Dirt Cups are a festive, no-bake dessert with layers of smooth chocolate pudding, fluffy whipped topping, and crunchy cookie “dirt,” all finished with spooky candy decorations. They’re quick to assemble, easy to customize, and guaranteed to be a crowd favorite at any Halloween gathering.
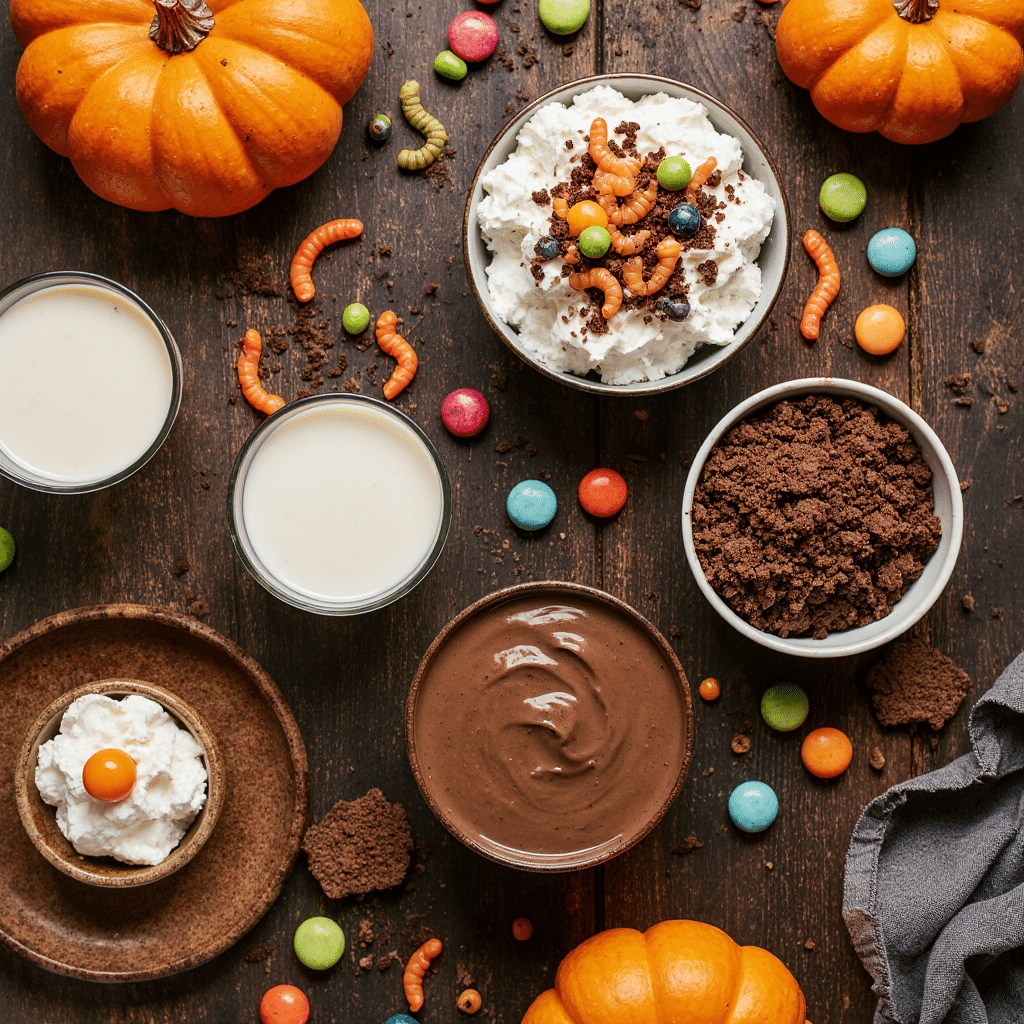
Ingredients
- 1 package (3.9 oz) chocolate instant pudding mix
- 2 cups cold milk
- 8 oz whipped topping (such as Cool Whip), thawed
- 15 chocolate sandwich cookies (like Oreos), crushed into fine crumbs
- Halloween candies for decorating: candy pumpkins, gummy worms, candy eyeballs, or marshmallow ghosts
- Optional: 4 oz cream cheese (for extra richness)
- Clear cups or small jars for serving
Instructions
- Pour cold milk into a mixing bowl and add the pudding mix. Whisk for about 2 minutes until smooth, then set aside for 5 minutes to allow it to thicken.
- Fold the whipped topping into the pudding until combined. If you want a thicker, cheesecake-style texture, beat the cream cheese until smooth, blend it into the pudding, then add the whipped topping.
- Crush cookies into fine crumbs using a food processor or by sealing them in a bag and rolling over them with a rolling pin.
- In each cup, add a layer of pudding, then a layer of cookie crumbs. Repeat until the cup is nearly full, ending with cookie crumbs.
- Top each cup with festive candies to give it a fun Halloween look.
- Refrigerate for at least 1 hour before serving so the flavors blend and the layers set.
Notes
- Store in the refrigerator for up to 3 days.
- Add candy toppings right before serving to keep them fresh and crisp.
- For a gluten-free option, use gluten-free cookies.
- Prep Time: 1 hour
- Cook Time: 1 hour
- Category: Dessert
- Method: No-bake
- Cuisine: American
Nutrition
- Serving Size: 1 cup
- Calories: 290
- Sugar: 20g
- Sodium: 280mg
- Fat: 14g
- Saturated Fat: 9g
- Unsaturated Fat: 4g
- Trans Fat: 0g
- Carbohydrates: 34g
- Fiber: 1g
- Protein: 3g
- Cholesterol: 10mg
Ingredients for Halloween Dirt Cups
- Chocolate instant pudding mix (3.9 oz) – The base of the dessert, giving it a rich, creamy chocolate flavor that pairs perfectly with the cookie “dirt.”
- Cold milk (2 cups) – Essential for setting the pudding quickly and creating a smooth texture. Whole milk makes it richer, but any milk works.
- Whipped topping (8 oz, thawed) – Adds lightness and a fluffy texture to the pudding layer.
- Chocolate sandwich cookies (15, finely crushed) – These create the “dirt” layer. Crushing them finely ensures every bite has that crumbly, chocolatey texture.
- Halloween-themed candies – Candy pumpkins, gummy worms, candy eyeballs, or Peeps ghosts add festive flair and a playful touch to the cups.
- Optional cream cheese (4 oz, softened) – For an extra creamy, cheesecake-like flavor in the pudding layer.
- Clear plastic cups or jars – Show off the layers and make serving easy, especially for parties.
Instructions for Making Halloween Dirt Cups
- Mix the Chocolate Pudding
In a medium bowl, combine the cold milk with the chocolate instant pudding mix. Whisk steadily for about two minutes until the mixture is smooth and free of lumps. Let it rest for five minutes so it can thicken into a creamy base. This step ensures the pudding layer in your Halloween Dirt Cups holds its shape when layered with the “dirt” topping. - Incorporate the Creamy Layer
Once the pudding is set, gently fold in the thawed whipped topping until fully blended. This creates a light, airy mousse texture. If you want richer Halloween Dirt Cups, beat softened cream cheese until smooth, then mix it into the pudding before adding the whipped topping. This extra step gives the dessert a cheesecake-like flavor and a thicker, more indulgent filling. - Create the Edible Dirt
Place the chocolate sandwich cookies into a food processor and pulse until they turn into fine crumbs. If you don’t have a processor, place the cookies in a zip-top bag and crush them with a rolling pin. For the best texture in your Halloween Dirt Cups, aim for mostly fine crumbs with a few small chunks for crunch. - Layer the Dessert Cups
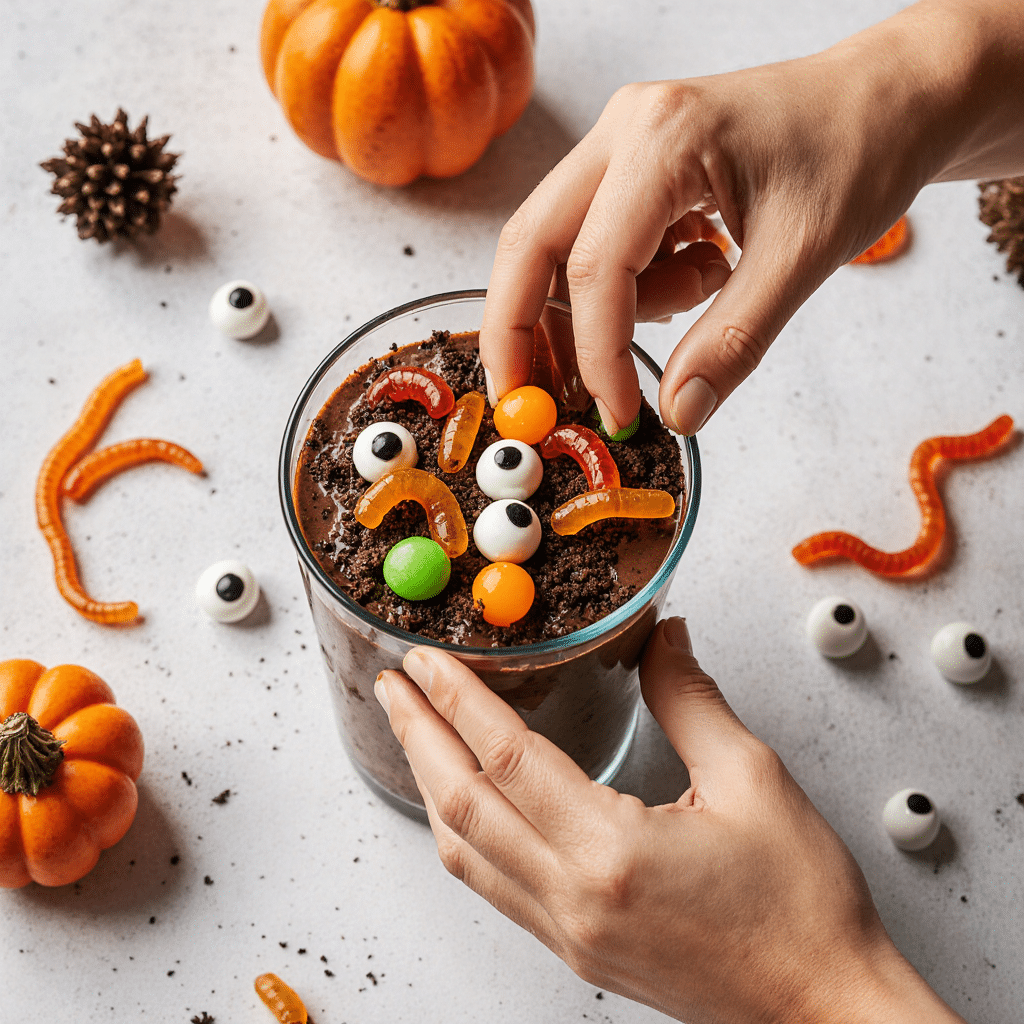
Spoon a layer of pudding mixture into the bottom of each clear cup or jar. Sprinkle a layer of cookie crumbs over the pudding, then repeat the process, alternating layers until you reach the top. Always finish with cookie crumbs for that realistic “dirt” look that makes Halloween Dirt Cups so visually fun. - Add Spooky Decorations
Top each cup with Halloween-themed candies such as gummy worms crawling out of the “dirt,” candy eyeballs peeking through the crumbs, or a pumpkin patch made from candy pumpkins. This is where your Halloween Dirt Cups can be customized you can keep them kid-friendly or make them extra eerie for adults. - Chill and Serve
Place the Halloween Dirt Cups in the refrigerator for at least one hour before serving. Chilling helps the layers firm up and allows the flavors to blend. Keep them cold until you’re ready to enjoy, so the topping stays fresh and the texture remains perfect.
How to Serve Halloween Dirt Cups
For the best flavor and presentation, serve Halloween Dirt Cups well chilled so the pudding layer stays creamy and the cookie crumbs keep their crumbly texture. Arrange the cups on a large platter or tiered dessert stand to make them the centerpiece of your spooky table. Scatter candy corn, plastic spiders, or faux cobwebs around the display for extra Halloween atmosphere.
If you’re making Halloween Dirt Cups for a kids’ party, keep the toppings playful with gummy worms, candy eyeballs, or marshmallow ghosts. For adults, you can add a sophisticated twist by incorporating dark chocolate shavings or even a drizzle of salted caramel on top. Clear cups work best because they showcase the layered effect, making each cup as fun to look at as it is to eat.
Serve with small dessert spoons and encourage guests to dig down through the “dirt” to reach the creamy pudding underneath. The mix of textures and the surprise of hidden decorations make Halloween Dirt Cups a memorable dessert for any spooky gathering.
Freezing and Storage
Halloween Dirt Cups are a make-ahead dessert dream, but storing them correctly is key to keeping their texture and flavor at their best. In the refrigerator, they will last up to three days when covered tightly with plastic wrap or stored in an airtight container. For the freshest results, add the decorative Halloween candies just before serving. This prevents gummies, marshmallows, or candy pumpkins from softening and losing their shape while chilling.
If you’re preparing them a day or two in advance, consider keeping the cookie crumb layer separate until you’re ready to assemble. Crushed cookies can absorb moisture from the pudding over time, which can lead to a softer “dirt” layer. By storing the crumbs in a sealed container at room temperature and adding them right before serving, you’ll get that satisfying crunch in every bite.
While freezing Halloween Dirt Cups is possible, it’s not recommended if you want to maintain the creamy, mousse-like texture of the pudding layer. Pudding tends to separate and develop ice crystals when frozen, which can make it watery or grainy once thawed. If you do decide to freeze them, assemble the cups without any toppings, wrap them well, and store them for no longer than one month. Thaw overnight in the refrigerator, then add fresh toppings before serving.
For large gatherings, you can prepare the pudding mixture up to two days ahead, store it in the refrigerator, and assemble the cups on the day of the event. This method keeps each element fresh while still giving you the convenience of a make-ahead dessert.
With the right storage method, your Halloween Dirt Cups will stay delicious, visually appealing, and ready to wow your guests whenever you’re ready to serve them.
Recipe Variations
One of the best things about Halloween Dirt Cups is how easy they are to customize. With a few creative tweaks, you can make them fit any party theme, age group, or flavor preference. Here are some fun ideas to inspire your next batch.
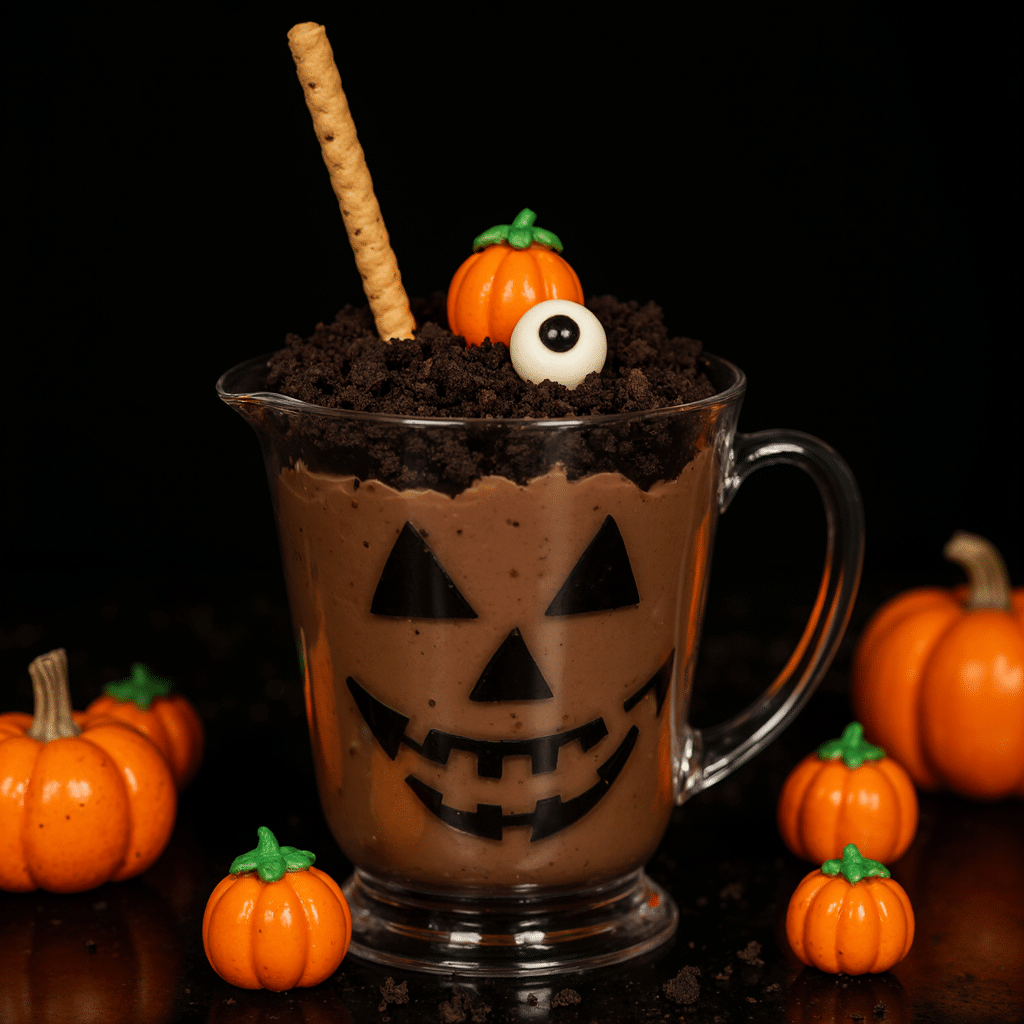
Pumpkin Patch Cups
Top your dirt cups with candy pumpkins and use green icing or colored coconut shreds to create “vines” and “grass.” This variation is perfect for kids’ school parties or fall festivals.
Graveyard Dirt Cups
Use rectangular cookies as “tombstones” by writing spooky names or “RIP” in icing. Add candy bones or skulls for extra Halloween flair. Serve these in slightly larger cups so you can fit more decorations on top.
Boozy Dirt Cups for Adults
For an adults-only version, mix a splash of Irish cream, coffee liqueur, or pumpkin spice liqueur into the pudding layer. This adds a warming, decadent twist while keeping the dessert festive.
Spider Nest Cups
Pipe chocolate icing in a spiral on top of the “dirt” and drag a toothpick through it to create a spiderweb pattern. Add a small candy or plastic spider for a creepy finishing touch.
Flavor Switch-Up
Swap the chocolate pudding for vanilla, pumpkin spice, or cookies-and-cream pudding mix. Use matching cookie flavors for the “dirt” to coordinate with your chosen pudding.
Mini Dessert Shooters
Assemble the dirt cups in shot glasses for bite-sized treats. These are great for buffets or large gatherings where guests want a small sweet option.
With endless ways to mix and match toppings, flavors, and presentation, Halloween Dirt Cups can be made fresh and exciting year after year. Whether you keep them classic or experiment with bold ideas, they’ll always be a hit at your Halloween celebration.
Conclusion
Halloween Dirt Cups are the perfect mix of fun, flavor, and festive charm. They’re simple enough for busy weeknights yet impressive enough to bring to any Halloween party. With layers of creamy pudding, crunchy cookie “dirt,” and playful decorations, they offer endless possibilities for creativity.
Whether you stick to the classic gummy worms and candy pumpkins or go all out with themed variations like graveyards and pumpkin patches, these sweet little cups are guaranteed to be a crowd favorite. They’re easy to make, kid-approved, and adaptable for adults who want a grown-up twist.
So, the next time you’re looking for a dessert that’s as fun to make as it is to eat, give Halloween Dirt Cups a try. With minimal effort and maximum impact, they’re a surefire way to make your spooky celebration even sweeter.
For more recipes and seasonal inspiration, follow us on Pinterest and Medium — we share quick desserts, festive treats, and kitchen tips you can use all year long.
Frequently Asked Questions
Can I make Halloween Dirt Cups ahead of time?
Yes! Halloween Dirt Cups are perfect for making ahead. You can prepare them up to 24 hours in advance and store them in the refrigerator. For the best texture, add the cookie crumb topping and decorations just before serving so they stay crunchy and vibrant.
What type of cookies work best for the “dirt” layer?
Classic chocolate sandwich cookies like Oreos are the most popular choice for Halloween Dirt Cups because they crush into fine, dark crumbs that look just like soil. However, you can experiment with chocolate graham crackers or gluten-free chocolate cookies if you need a different option.
Can I use homemade pudding instead of instant pudding mix?
Absolutely. Homemade pudding works well, but you’ll need to make sure it’s completely cooled before layering it into the cups. Instant pudding is quicker and helps the dessert set faster, but homemade adds a rich, from-scratch flavor.
Are there ways to make Halloween Dirt Cups healthier?
Yes. You can use sugar-free pudding mix, light whipped topping, and reduced-fat milk to cut calories. Also, consider adding fresh fruit like sliced strawberries or raspberries between layers for a fresh twist.
How can I make these more festive for adults?
Add a small amount of coffee liqueur, Irish cream, or pumpkin spice liqueur to the pudding layer. Serve them in stemless wine glasses for a more elegant presentation while keeping the spooky charm.
Can I make a large version instead of individual cups?
Yes! You can assemble Halloween Dirt Cups in a large trifle dish or a 9×13-inch baking dish, layering pudding, crumbs, and decorations the same way. This option is great for serving a crowd and makes cleanup even easier.